Before Reassembly
Cleaning Parts
-
I have a cup style wire brush that goes on a large grinder that I use to clean rust and old paint. This is an industrial grade grinder that I've had for at least 35 yrs. I have found a cleaner at Walmart that works well. It's called Super Clean and comes in a purple spray bottle. You can also but it in a gallon size. It's very high detergent, I recommend latex gloves if you get your hand in it. The gray color on the cover is Eastwood Spray Gray and the black is Rustoleum semi-gloss. If I have heavy rust, I use a product called Extend, made by Loctite. I get the paint on bottle, it also comes in spray. Very good product.
-
Jim Conner - ’68 Cuda
Removing Rust (Chemicals)
-
Sodium carbonate can be found in the laundry soap aisle of the supermarket. Look for "Washing Soda"; it will probably be on the shelf next to Borax. You can also find it in pool and spa supply stores as "pH Increaser". Read the ingredients on the label to make sure its pure sodium carbonate. Sodium carbonate should be in your garage anyway, since its used to make the electrolyte solution for electrolytic rust removal. I did a rust removal post a long time ago if you want to search the archives, or just Google "electrolytic rust removal". There's a how-to video on the Mopar Mailing List website:
Removing Rust (Wire Wheel)
-
You will spend hours at the wire wheel cleaning bolts, the battery tray and one of the brackets that holds the front bumper to the frame. The majority of that time was spent on bolts, for the doors, trunk lid hinges, hood hinges, front clip. fenders, etc. Your body guy needs them when he starts assembling the car. Very tedious.
-
-
Wipe off all the bolts cleaned up the previous day (they soaked overnight in a rust dissolver).
Media Blasting Cabinet
-
Consider purchasing a media blasting cabinet to save you time and effort restoring car parts.
De-Rusting Chrome
-
Oxalic acid, the acid part of Prestone Heavy Duty Radiator Cleaner, (discontinued several years ago) can also be used for de-rusting chrome.
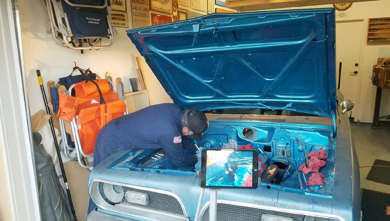
Cleaning Engine Bay
-
Use simple green and cotton cloth to scrub most of the grease off and finish with Armor all cleaning wipes.
-
Josh Walton
Bolts
-
If you have issues with bolds and threads, run a tap down the hole after blowing it out with compressed air because there may be dirt or other debris lodged inside there. But as long as you have enough threads to keep it tight, it should be good.
-
Nathan
-
-
Whenever I doubt the correct bolt is in there, I run something thin down the threaded hole to gauge the depth of the hole and compare that to the length of the bolt (minus the thickness of whatever the bolt is holding, of course).
-
-
The bolt doesn't have to run all the way to the end of the threaded hole but it should have enough threads for the job. An easier way is to count turns from engagement until the bolt is tightly in place. I thought someone said the length of engaged threads into the hole should be equal to or greater than the bolt diameter, to provide enough tensile force (clamping force).
-
Ed
-
-
"I thought someone said the length of engaged threads into the hole should be equal to or greater than the bolt diameter, to provide enough tensile force (clamping force)."
-
Correct. This is the rule of thumb I've used for many years. Dr. Mosley may have additional input, but I think the logic is sound.
-
Josh Walton - ‘68 Conv., ‘67 coupe
-
-
When dealing with studs I like to see at least one diameter sticking out past the nut also. Found this on Fastenal’s site:
-
“For carbon steel fasteners (including tapped holes) the length of engagement would be limited to approximately one nominal diameter (approximately 1-1/2 times the diameter for aluminum). After that, there is no appreciable increase in strength. Once the applied load has exceeded the first thread's capacity, it will fail and subsequently cause the remaining threads to fail in succession.” Page has some good reading, this bit about thread strength is the bottom of the page. There is also a section explaining why rolled threads are preferable.
-
-
Another note, if you want to chase threads on a bolt, stud, or threads cut into an object it is always better to use a thread chasing tool and not a cutting tap or die. Especially if the bolt or stud has rolled threads. Cutting material can make the threads weaker.
-
Michael Mosley
Sealing Parts
-
Pans and covers come with two types of seal surface. If its completely flat (typically on axle housings), RTV sealer is required. A conventional gasket will not seal. It also has to be RTV that is compatible with the fluid e.g. synthetic gear oil requires grey RTV (there is a Chrysler TSB about this; the oil will attack blue, black and red) (for engine use, it must be labeled as being safe for O2 sensors, if the vehicle is so equipped; black and grey are permissible).
-
-
If the seal surface has a longitudinal stiffening ribs stamped into it between the holes, it is designed to be used with a gasket. It can be used with RTV though. In either case, the seal surface has to be straightened with a hammer and dolly if necessary. If used with a gasket, it will be deformed around the holes, particularly if it was tightened without using a torque wrench, and must be straightened.
-
-
When using RTV, don't use too much. Make a circle around each of the screw holes, then connect the circles with a line. There should only be a tiny bead squeezed out after the screws are tight. Do not fill any fluids until the RTV has completely cured (typically 24 hours, but it depends upon atmospheric humidity; higher humidity = faster cure).
Before you Begin
-
When the car comes back from media blasting, get the body up on 4 jack stands. Now your just about ready to start getting the suspension back on the car. POR some spots on the undercarriage that didn't have undercoating sprayed on them. That will be due to masking and the saw horse that the car was resting on in the body shop. Now there shouldn’t be any bare metal anywhere to rust!
During Reassembly
-
When using assembly lube, be generous, it does't hurt.
-
-
During restoration of parts, use POR 15 as a rust inhibitor. You can buy it almost anywhere - search the web.
-
-
During reassembly, use tape on the body after painting, It saves the car paint from chipping when putting back parts during reassembly.
-
Bolt Orientation
-
The way Chrysler put in bolts without reference: Put in bolts from front of car towards back.
-
Graveyard Cars
Nuts Replacement
-
Nowadays they use a nut with nylon inside to prevent nut from backing off. They used to use a crush nut. They put as wedge on the nut. Nut has oval one side, round on the other.
Final Reassembly
-
check all fluid levels: engine oil, antifreeze, transmission oil, grease suspension, differential fluids (If you can touch grease in rear end filler hole, it is full enough. You don’t want it over that point) ...
-
Check linkages for any missing cotter pins, check brake lines, all clips are in place, emergency brake is tight, leaf spring hangers, tank.
-
When test driving, check for rattles and squeaks, .... braking, heating, ...
-
Graveyard Cars
Order
-
Begin with replacing and installing brake lines. Install the brake distribution block and right front brake line. It is much easier to get them in while the engine bay is empty.
-
2. Replace the parking brake assembly. This is to make sure your car doesn’t roll. Safety First!
-
Replace Suspension, reinstalling complete front end assembly
-
4.Install K member
-
5.Install upper ball joints into upper control arm bushings by screwing them in and put cups on them.
-
Then lower control arm bushings on to the lower control arms. Use a press to do that.
-
Put lower control arms on first to the k member. Put shaft into the hole.
-
Later assemble brake drum system, attach the brake backing plate to spindle.
-
Install the steering box
reinstalling partial front end assembly
-
Put on front suspension first. Add torsion bars (1 each side). Tread them through holes in chassis. Add bushings. Then attach. Then put on tires.
reinstalling complete rear end assembly
-
Before rear end, pedal under dash, brake lines, fuel lines, fuel return lines.
-
If reinstalling complete rear end assembly, put on rear shocks first.
-
Put on greased bolt to leaf spring hanger first, then attach rear assembly with greased bolt through hanger to chassis.
-
Attach front part of leaf spring to chassis first then attach rear part of leaf spring to chassis.
reinstalling partial rear end assembly
-
6. Install the Leaf spring rebuild kit. You can put this on after car is rebuilt.
-
-
Put in steering column before master cylinder brakes because of coupler to steering box.
-
Put in Brake booster
-
Install master cylinder and bleed
-
Replace Brakes and Wheels
-
-
Replace all body plugs
-
Install the throttle pedal and linkage
-
Install Heater with hoses
-
Install the rebuilt heater box along with the vent assembly refurbish the heater controls
-
-
Install control arms, then work your way around. Put in order before you tighten everything up.
-
Replace Electric Harnesses
engine bay reassembly
-
Put on fire wall components before the engine install such as: regulators, ballast, hook up wiring, windshield wiper motor, front brake lines, things under dash after the engine install
-
Install relay mechanism for brakes disproportioning valve windshield washer reservoir horn
-
-
Put stuff back in the Engine Bay on the firewall before engine such as:
-
power booster
-
relay mechanism for brakes
-
disproportioning valve
-
windshield washer reservoir
-
windshield wiper motor
-
front brake lines
-
things under dash
-
horn
-
-
Replace the Gauge Cluster (Dash Board)
-
Before installing, paint the back a lighter color such as a silver or gray. It lightens up the whole area under the dash and makes it easier to work on when you're wiring everything up.
-
Clean the pressure plate and flywheel surfaces with brake cleaner.
-
Bolt on the flywheel/clutch assembly with the motor out of the car. It would've been a pain doing it lying
-
on your back under the car.
-
Replace the engine motor mounts
-
Bolt up the bell housing to the block.
-
Put back the Engine (cover fenders and nose with blankets or sheets)
under carriage reassembly
-
Put all fuel lines and vent lines in put torsion bars in and drive lines in put in brake lines, parking brake cables
-
-
Put back the Transmission, then peripheral things like upper control arms, cables, hoses, torsion bars.
-
Replace Driveshaft
-
Put in the engine / front wiring harness.
under dash reassembly
-
Put in heater box, petals, cables....before dash goes in. Put on heater cables to dash, then put in Dash. After heater box, all under dash provisions, then dash itself.
-
-
Install the switch that mounts above the kick panel
-
Put in sound deadener (insulation) on the rest of the firewall
-
Install (Classic Industries) heater hose mount on the passenger side shock tower
-
Install the parking brake
-
Install the Pedal Assembly
-
Install everything around the axle while you still have a lot of free space
-
Fuel Tank Assembly
-
Install sending unit to fuel tank
-
Spray on adhesive on top of tank
-
Put fuel tank pad on top of fuel tank
-
install fuel tank
-
-
Install Dash with Gauge Upgrades. (After dash installation, you can replace the front windshield).
-
Update the dashboard with a tach, 150mph speedo, new bezel and lenses.
-
Install brighter bulbs with new reflective "titanium white" paint in the illuminated gauge areas.
-
Bolt in dash, now hook up cables, wiring, After Dashboard, then put in kick panels, a filler moldings, visors, rear view mirror...
-
Put in front engine harness.
-
-
Put back the Engine Bay Items: Radiator, Battery.
-
Put back hood.
-
Fan Shroud has to go over fan first, then drop in radiator.
-
After you install the radiator, then install the tranny cooling lines, then hoses.
-
-
Put back the mirror before replacing the side windows
-
Put back the Windows
-
Attach Windshield trim
-
Install Windshield Wiper arms
-
Install the hood-to-cowl seal.
-
Put back the Headlight Assembly
-
Install the Tail Light Assembly
-
Install front fender emblems and antenna (before front fender guards)
-
Install the front fender guards
-
Put back the Trim (bumpers, license plate bracket, stainless drip rail molding, etc. )
-
Put back all body bumpers, plugs
-
Put in headliner
-
Put back the Interior (rear view mirror, sun visors, etc.)
-
Put back the Interior (panels, panel trim...)
-
Put back Roof Rail Trim and gaskets
-
Install Sound Deadener
-
Install carpet in cargo area.
-
Install rear seat (bottom then back)
-
Install door sill plates
-
Replace Detail Items (Decals, etc.)
-
Install exhaust system. Put in order before you tighten everything up.
-
Install drive shaft.
-
Install new carpet, steam it to fit.
-
Check all fluid levels.
-
Tighten all bolts.
-
Interior Trim Install Order
-
Cargo floor panel
-
Cargo side panels
-
Trunk divider panel
-
Rear glass side trim panels
-
Rear glass center metal panel
-
Rear seat area carpet edge strips
-
A pillar covers
-
Kick panels
-
Door sill plates
-
Headliner side finishing strips
-
Rear seat area lower panels
-
Rear seat area upper panels
-
"L" shaped stainless trim strips on cargo side walls
-
Rear seat vinyl panels
-
Rear seat lower cushion
-
Rear seat upper cushion
-
Final Assembly
-
Raise car up and check torques of all bolts front to back.
Before Starting Car
-
For the First Time Pre-oil the engine prior to starting with a drill.
-
Instead of pulling the distributor, do the following: - pull the plugs - squirt some oil into each cylinder - crank the engine with the starter until the oil pressure comes up
-
Make sure the gauges all are working. Check all your fluid levels before you put the key in.
-
Have a fire extinguisher handy. Not kidding too much work went into it!
-
Mike Jarvie - ’68 FB
Start Up the Car
-
It appears the Mopar engineers did not feel it was necessary to fill the lifters with oil prior to starting up an engine after a cam change after re- assembly with liberal amounts of cam lube. They would fire it up and run it at 2000 rpm for twenty minutes to set the cam lobe pattern - the lifters will clatter initially but that will go away as they fill with oil and the lifters won't be damaged.
-
However, it seems to me it still begs the question of why take the chance on scoring bearings or damaging lifters.
-
Steve Toth
Start Up Troubleshooting
-
The proper steps to take if all checks out, start looking at weird stuff like a bad EI module, bad points condenser, cracked rotor or cap, carbon traces or moisture inside cap, etc. I've seen all these cause backfiring/ misfiring.
-
Ed
-
-
Pull no. 1 plug out, put your thumb over the spark plug hole, have someone bump the starter. You will know when you are on compression stroke. You will feel the compression. Look at you damper and readjust to top dead center. Then make sure your rotor is pointing to no. 1 cyl wire on the cap. If not, pull the distributor and rotate 180*. If it's backfiring through the carburetor, then your timing is off. If you wires are positioned correctly, your distributor is off. That's assuming your distributor drive gear is installed properly.
-
Jim Conner - ‘6
-
-
The crank turns two revolutions for each single turn of the cam and distributor.
-
TDC occurs on both the compression stroke (rotor at no. 1 wire position) and at the exhaust stroke (in order to expel exhaust gas). If you are 180* out, you are firing on the exhaust stroke. You are also firing somewhere else while an intake valve is open, causing backfire out of the carburetor. You can take the left valve cover off and watch your rockers to see when both valves are closed at TDC, but the thumb in the spark plug hole is easier. Just pull your coil wire off while bumping the starter.
-
Jim Conner - ‘6
Start Up Without the Dash
-
1. Run a hot lead from battery to remote starter on the starter then to ballast resistor
-
2.Wire to coil to distributer.
Rick Kreuziger’s ASSEMBLY SEQUENCE:
-
There are many different sequences of assembly possible. (some variation with different body types)
Sometimes I’ll jump from one area to another depending on parts available or other road blocks.
There are cases where the wrong order will give you headaches though!
Rick Kreuziger -
(from bare painted body shell)
-
Spray radiator saddle blackout
-
Rocker panel pinchweld blackout (if applicable)
Front frame rail side blackout (if applicable) -
1. trunk weatherstrip
-
2. body rubber bumpers
-
3. trunk latch mechanism
-
4. hood latches & release mechanisms
-
5. main body brake & fuel tubing
-
6. fuel tank & fuel hose connections
-
7. emissions tubes & hose connections (if applicable)
-
8. inner cowl insulation pad
-
9. firewall insulation pad
-
10. swing pedal(s)
-
11. brake booster (if applicable)
-
12. master cylinder
-
13. defroster duct
-
14. kick panel insulation pads
-
15. LH vent box (if applicable)
-
16. E-brake pedal assembly & front cable
-
17. wiper mechanism
-
18. wiper motor
-
19. heater box assembly
-
20. cowl vent screens (if applicable)
-
21. accelerator pedal & cable
-
22. dash assembly (completely assembled outside of car including instrument cluster, dash pad, glove
-
box liner, radio, speaker, wiring, etc.)
-
23. Vent pull cables, defroster & vent cables
-
24. proportioning valve & metering block (if applicable)
-
25. firewall brake tubing
-
26. starter relay
-
27. forward lamp harness
-
28. engine harness
-
29. starter wiring
-
30. washer bottle & hoses
-
31. ballast resistor
-
32. voltage regulator
-
33. horn relay (B-body cars)
-
34. horns
-
35. heater hoses
-
36. headlights
-
37. fender inner splash shields (front & rear of wheel)
-
38. rear suspension stop bumpers
-
39. rear seat belts (some bolt tips get undercoating)
-
40. rear shocks bolted in at top only & compressed
-
41. grille & headlight doors
-
42. front bumper
-
43. front valance (if applicable) with directionals
-
44. front & rear side marker lamps
-
45. rear bumper
-
46. radio antenna
-
47. fender emblems (if applicable)
-
48. rear of fender splash shields
-
49. undercoat wheel wells
-
50. exterior emblems
-
51. windshield & backlite stainless trim
-
52. windshield wiper arms & blades
-
53. other exterior trim
-
54. taillights
-
55. mid body/rear lamp wiring harness
-
56. dome lamp wiring harness
-
57. shoulder harness clips (if applicable)
-
58. rear grip strips (Bbody)
-
59. headliner
-
60. roof rail c-channels
-
61. roof rail weatherstrips
-
62. windshield & backlite moulding clips
-
63. windshield & backlite
-
64. upper control arms on body
-
65. fuel hose clamped on body side fuel tubing with keystone crimp clamp
-
66. install rear leaf springs front only
-
67. position rear end housing on springs
-
68. loosely fasten u-bolts
-
69. lift rear axle into position and install shackles
-
70. connect e-brake cables
-
71. connect brake line tubing & hose
-
72. DRIVETRAIN SUBASSEMBLY
-
a. K-member
-
b. engine
-
c. carb(s)
-
d. starter
-
e. alternator
-
f. fan & fan clutch
-
g. power steering pump (if applicable)
-
h. belts
-
i. motor mounts
-
j. trans & related hardware
-
k. lower control arms
-
l. strut rods
-
m. center link, idler arm, tie rods
-
n. steering box & pitman arm
-
o. fuel pump and tubing
-
p. fan blade
-
radiator hoses
-
73. drop body onto drivetrain subassembly
74. connect heater hoses
75. install trans crossmember
76. install driveshaft
77. connect shift linkages
78. install z-bar (if applicable)
79. connect clutch linkage (if applicable)
80. plug in electrical connections to engine
81. position fan shroud over fan blade
82. install radiator & connect hoses
83. connect trans cooler (if applicable)
84. bolt up fan shroud
85. install torsion bars
86. install exhaust system
87. install rear valance (if applicable)
88. set car on the ground
89. install & align door and quarter glass
90. install steering column
91. install carpeting
92. install seat belts
93. install quarter interior trim panels
94. install rear seat
95. install console (if applicable)
96. install front seat(s)
97. install trunk mat
98. install spare tire
99. install bumper jack